Ingredients
Equipment
| Blender or whisk and large mixing bowl | ||
| Microwave safe bowl | ||
| Microwave | ||
| 8-cavity silicone pudding moulds or 8 (½ cup/125 ml) pudding bowls or glasses (see tip) | ||
| Measuring cup | ||
| Cutting board and knife |
Ingredients
| 2 packets (7 g) | (2 tbsp (30 ml)) | powdered gelatin |
| ¼ cup | (60 ml) | sugar |
| 2 cups | (500 ml) | canned mango purée (see tip) |
| ½ cup | (125 ml) | whipping cream (35%) |
| 2 | mangoes, peeled, pitted and diced | |
| ¼ cup | (60 ml) | half and half cream (10%) or whole milk |
Directions
Instructions
- In a small bowl, stir together the gelatin powder and sugar; set aside. In a liquid measuring cup with ⅓ cup (75 ml) room temperature water, gradually sprinkle in gelatin mixture. Stir gently until thickened and no lumps remain (this is blooming the gelatin).
- Microwave the gelatin mixture on HIGH in 30-second increments until gelatin and sugar is fully dissolved; set aside.
- In a blender (see tip), combine the mango purée and whipping cream until smooth. Pour in the gelatin mixture and blend for 30 seconds until fully incorporated.
- Lightly grease an 8-cavity silicone pudding mold (see tip) with non-stick cooking spray and arrange on a baking sheet. Carefully pour mango mixture into each cavity. Refrigerate for at least 4 hours, or until completely set.
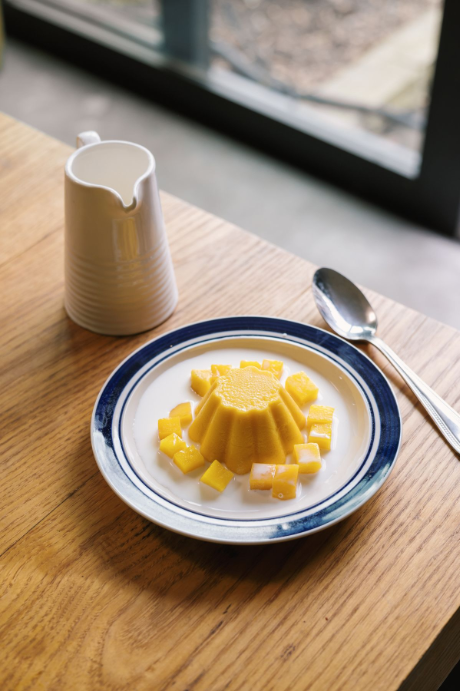
- To serve, unmold the puddings and assemble each in a small, rimmed plate with the diced mangoes. To finish, drizzle each with half and half cream (10%) or milk.
Tips
- If a blender is not available, simply whisk the ingredients together in a large bowl or measuring cup until everything is incorporated.
- If silicone moulds are not available, you can set the puddings in 8 (½ cup/125 ml) pudding bowls or glasses.
- If mango purée is not available, substitute with 1 ½ cup (375 ml) mango juice with 1 cup (250 ml) chopped fresh or frozen mangoes and blend together in Step 3.
- For a vegetarian option, substitute gelatin with 2 tsp (12 ml) agar agar and boil with 1/3 cup water for 1 to 2 minutes before using in Step 3.